How to configure Snapshots
A Snapshot can be likened to a photograph or screengrab taken of a single page of your website. You provide the URL and our tool will browse to the at set intervals and take a snapshot of the page in its exact state. The image is stored within Kurtosys for you to search for and refer to whenever you need it.
In this way you keep an easily accessible record of the state of your web content at any given point in time for up to 10 years.
To set up Snapshots successfully you will need:
- The URL of the page you want to snapshot that includes dynamic inputs if there are multiple versions of the page
- e.g. https://www.kurtosys.com/services/layout/assets/647a330c-4862-42da-bfd2-6ee4aed31ffc/PRODUCTION/index.html#/product?isin={isin}&culture={culture}
- In this example the dynamic inputs are isin={isin} and culture={culture}.
- If the page has tabs or hidden content that needs to be included in the snapshot then the following will need to be put in place by a Kurtosys Developer:
- All tab containers on the website page need to be coded to check for the isSnapshot flag. If the flag is true then the content will display in flat form on a single page.
- The URL used to configure snapshots must include the flag isSnapshot=true e.g. https://www.kurtosys.com/services/layout/assets/ 647a330c-4862-42da-bfd2-6ee4aed31ffc/PRODUCTION/ index.html#/product?isin={isin}&culture={culture}&isSnapshot=tru
Once the above is in place you will be able to start configuring Snapshots.
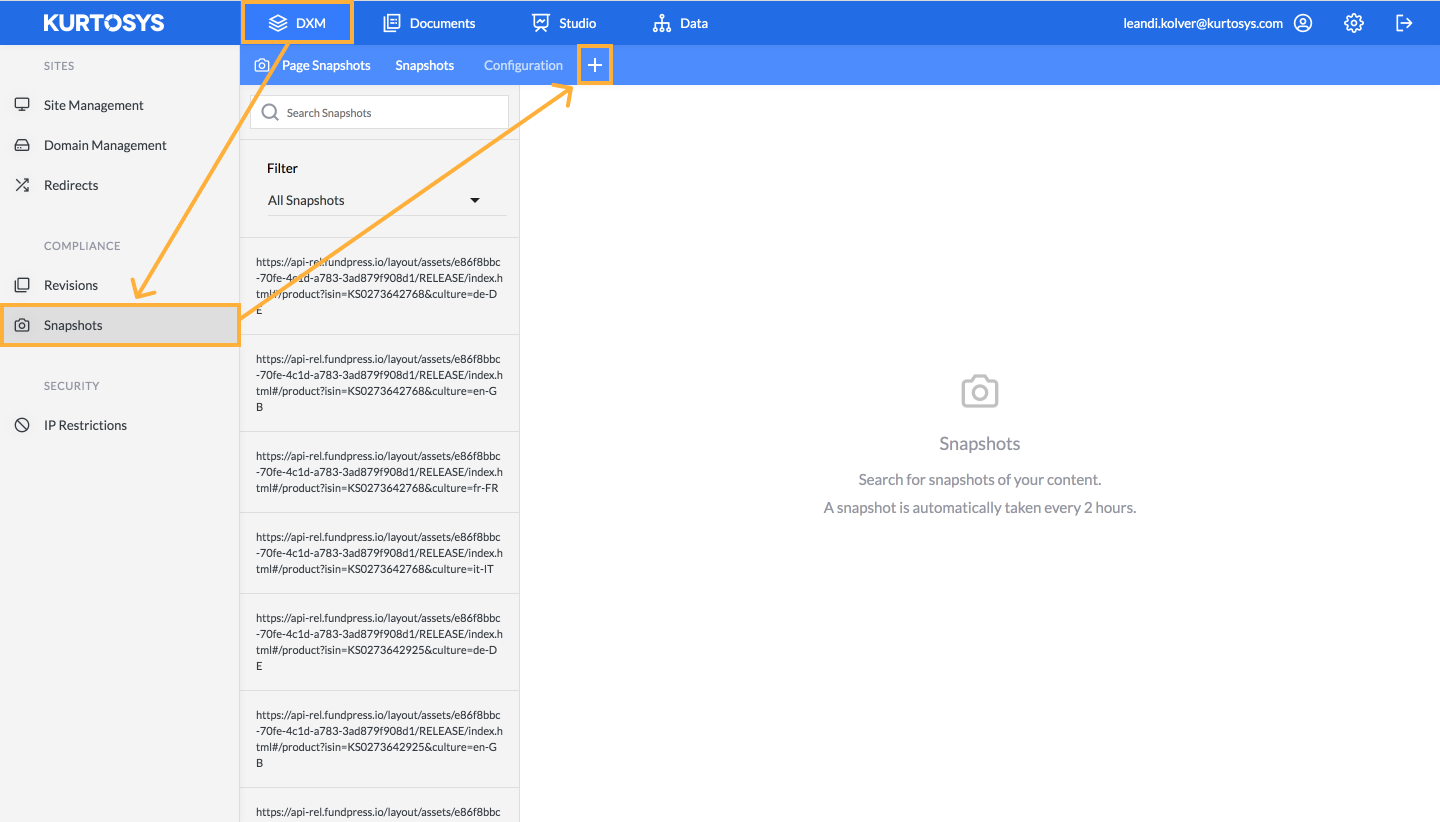
To create a new set of Snapshots navigate to the Snapshots module under Kurtosys DXM and select the ‘+’ icon to start the configuration process.
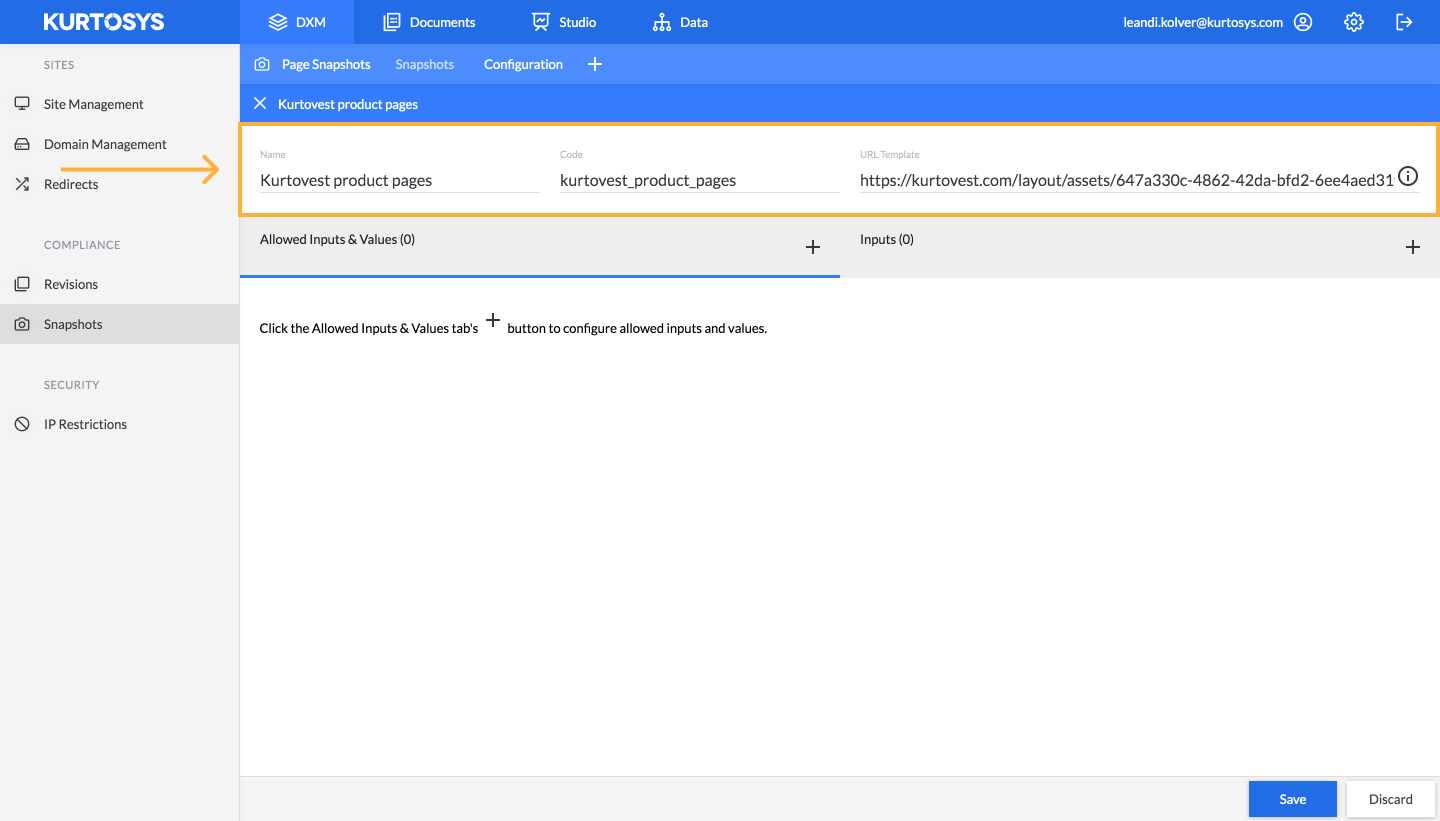
Fill in the following fields:
- Name – this is the label used within Kurtosys to identify the Snapshot set and used as a search filter.
- Code – this is the system name given to the Snapshot set so that it is usable as a label in the code. Code should always be written in lower, snake case e.g. snapshot_name
- URL Template – This is the URL that should include dynamic inputs to insure all versions of the page are snapped
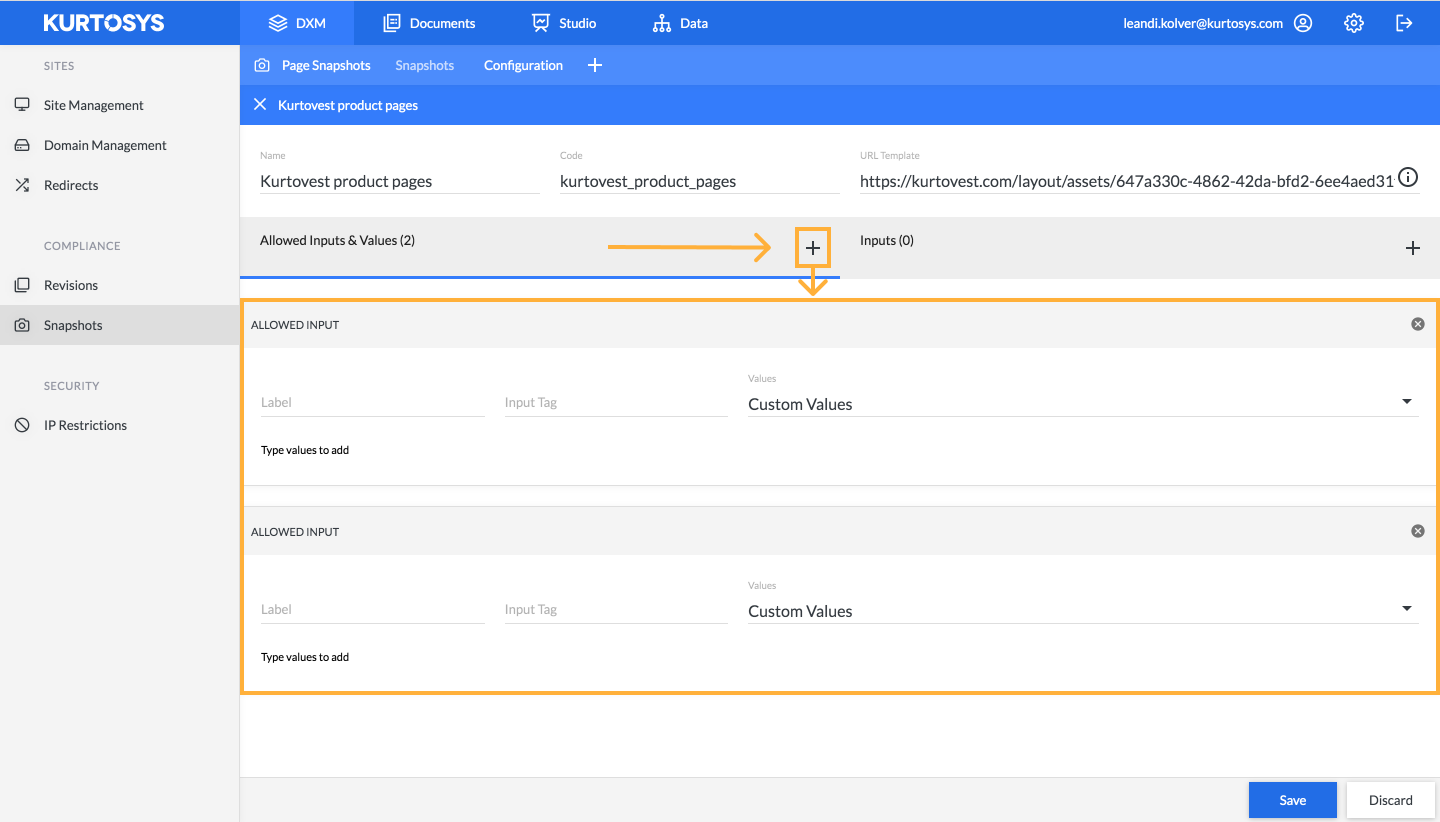
To complete the configuration, you will need to give the tool instructions on which Inputs it needs to use to create the Snapshot set.
Select the + icon to the right of the Allowed Inputs & Values tab. This will open up a form that you will need to fill in to add a new Allowed Input. Select the + icon for each Allowed Input you want to create:
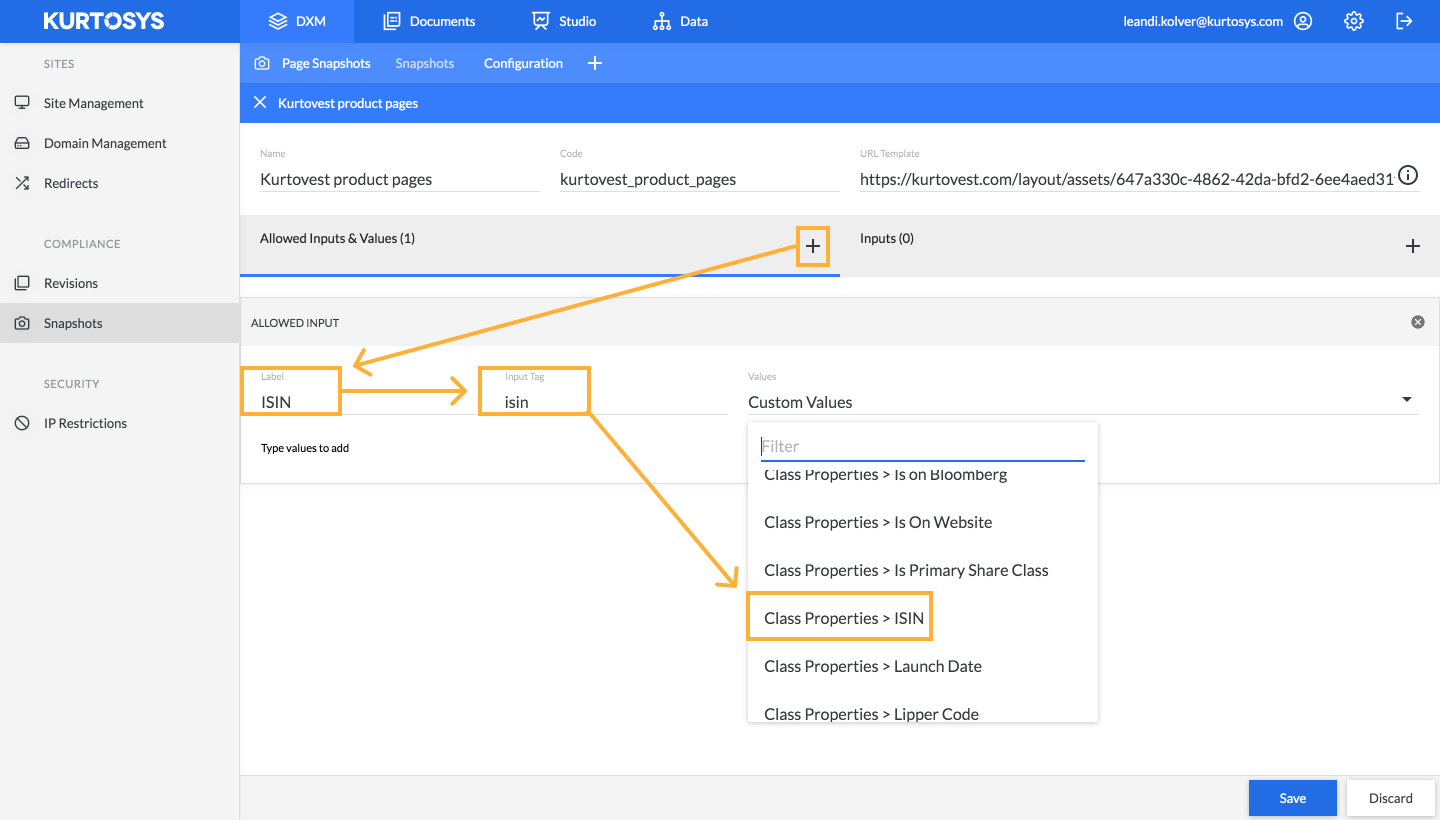
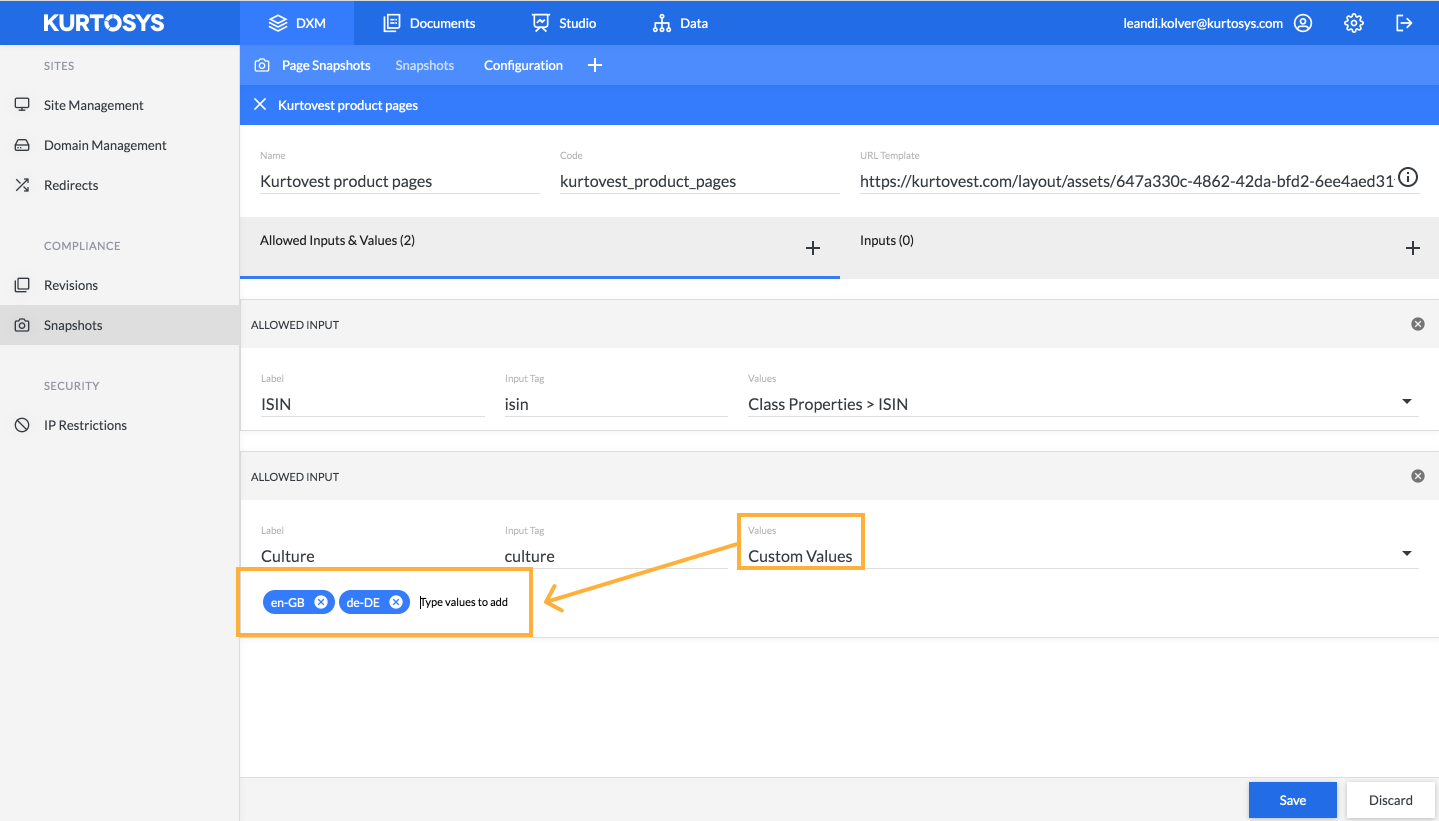
Complete the following form fields to set up your Allowed Inputs:
- Label – The name of the property you want as a dynamic input. This label will be used as the column heading under ‘Inputs’.
- Input Tag – Similar to code this is the system name given to the Snapshot set so that it is usable as a label in the code and the URL. It should match the property unique code under the Data Dictionary and the first word in the URL’s dynamic input i.e. isin={isin}.
- Values – Lists the available properties from which unique inputs will be drawn to generate unique snapshots e.g. Class Properties > ISIN. Both Shareclass and Fund properties are listed in the dropdown menu.
For all other property types, e.g. Culture, Custom Value should be selected the the Accepted Value options manually inserted in the Type values to add text box e.g. en-GB, de-DE.
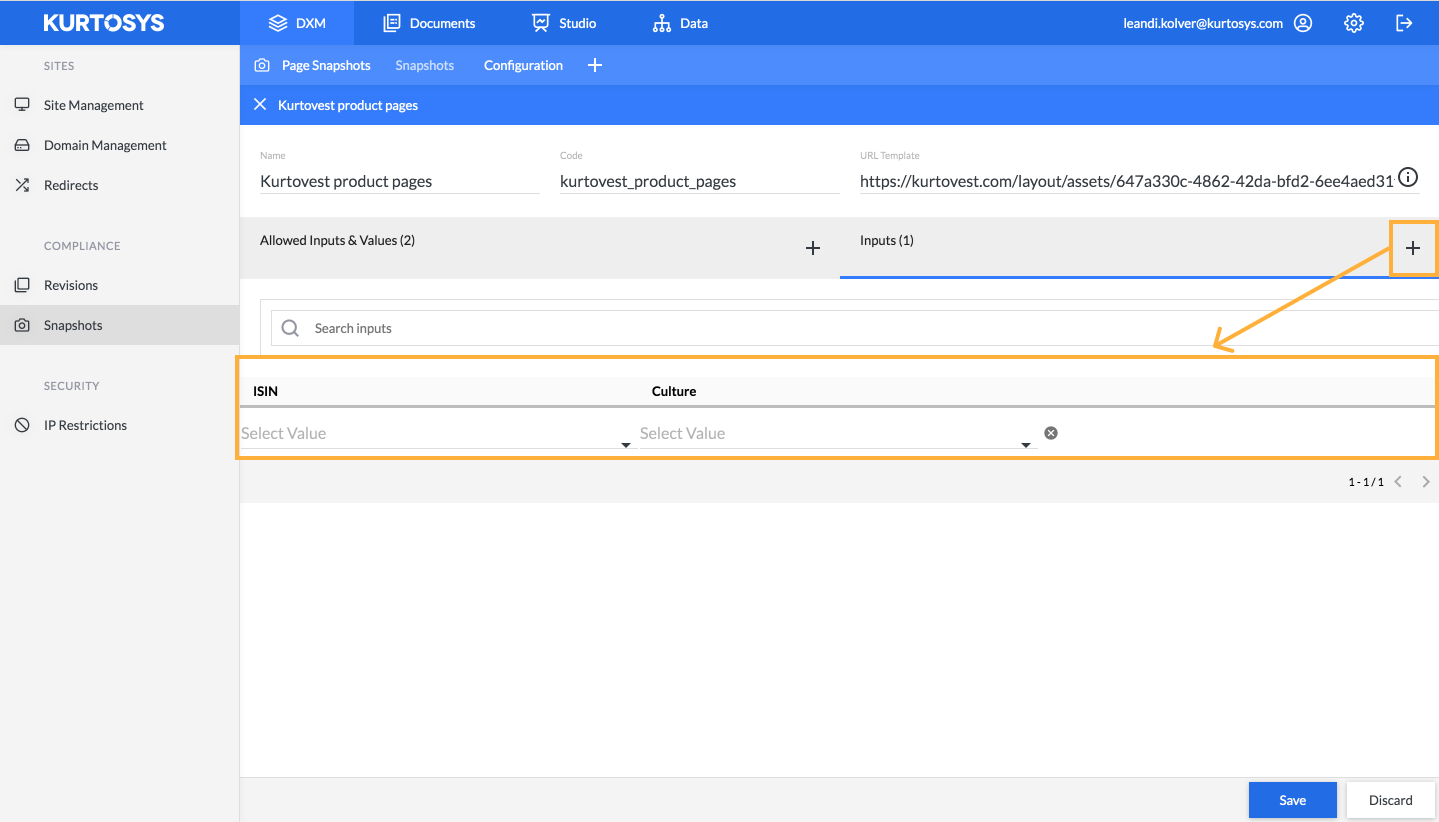
Once Allowed Inputs and values have been defined, open the Inputs tab. Select the ‘+’ icon to the right of Inputs. Here you will find that your Allowed Inputs form the column headers of a table. Selecting the ‘+’ icon will add a form row that you can fill in.
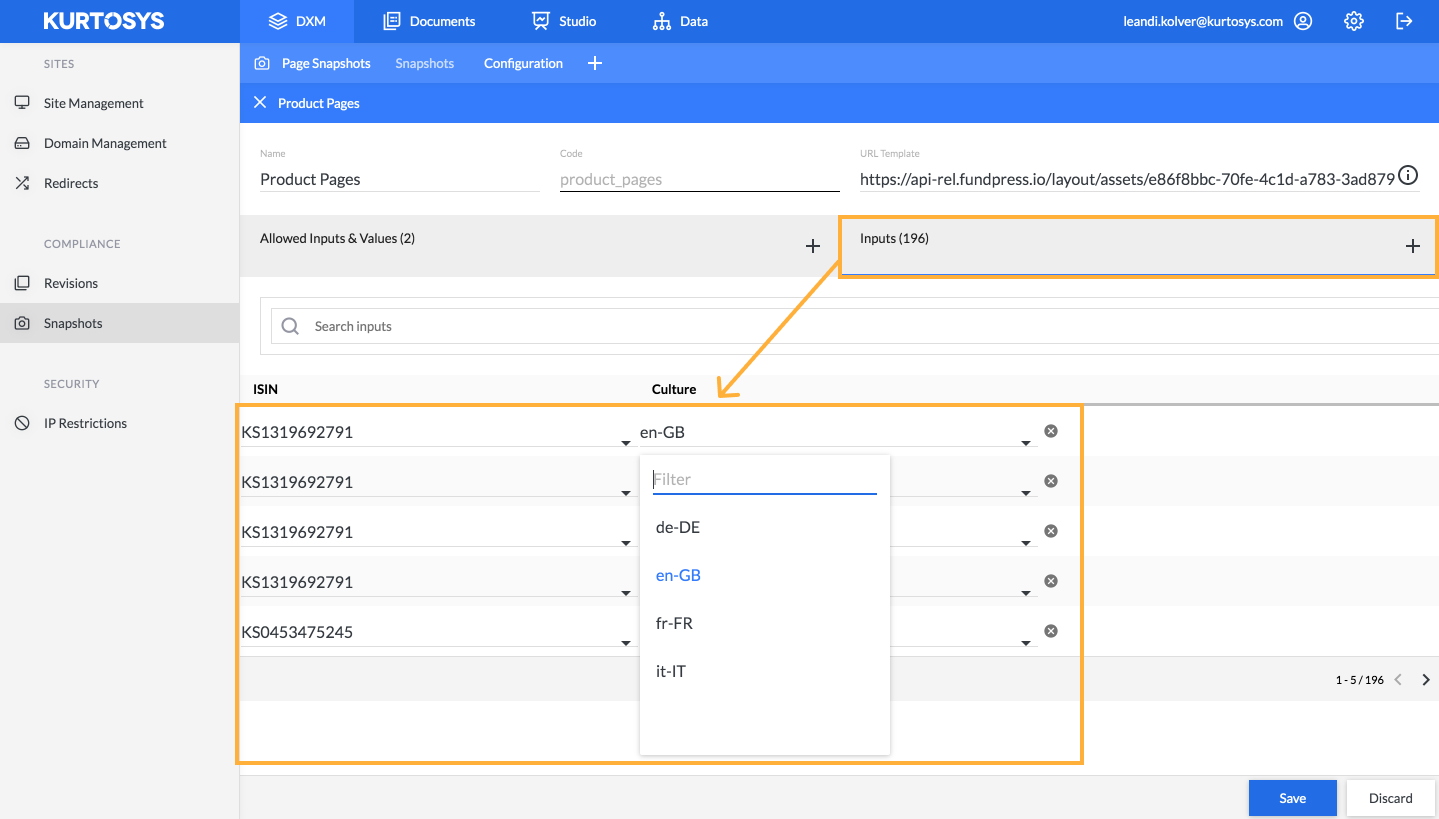
You will now add all the unique inputs into the table that will define the different pages and associated URLs you want snapped. Use the filterable dropdown menus to add the applicable property values for each allowed input. Remember that if you have pages with multiple cultures, you will need to list each culture combination as its own entry.
Once all Inputs have been defined you can select ‘Save’. Your new Snapshot set will be listed under Configuration and automatically added to the Kurtosys Snapshot run.